

 0
0
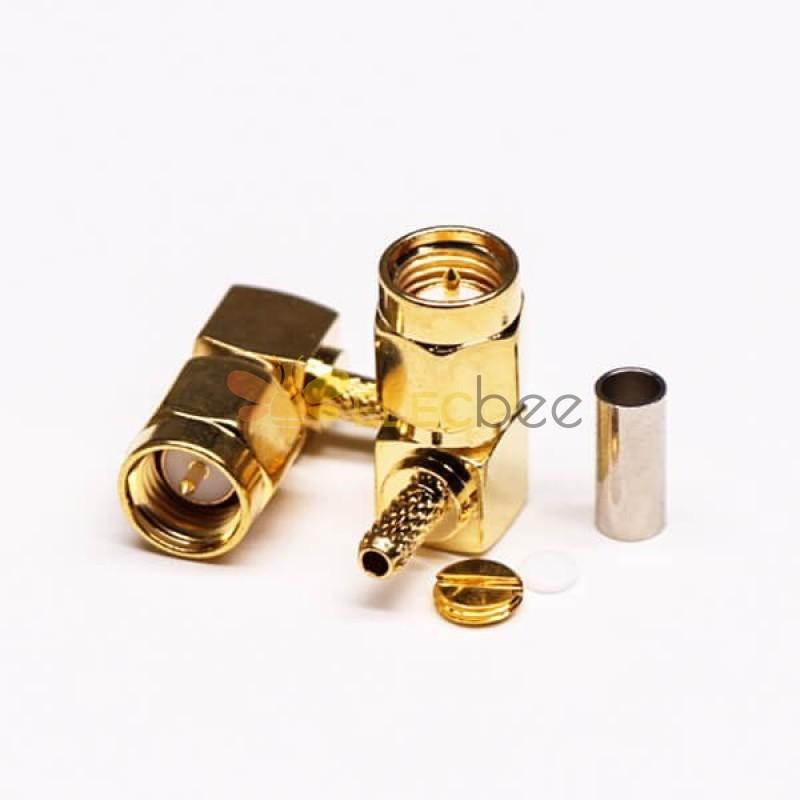
SMA connectors are a popular type of RF connector used in a variety of applications, from telecommunications to radio communications to test and measurement equipment. They are known for their durability, high-frequency capabilities, and easy assembly. In this article, we will provide a step-by-step guide on how to assemble an SMA connector.
Step 1: Gather Your Materials
Before you begin assembling your SMA connector, make sure you have all the necessary materials. You will need:
- An SMA connector
- A coaxial cable with the appropriate diameter for your SMA connector
- A pair of pliers
- A wire stripper
- A soldering iron and solder
- Heat shrink tubing (optional)
Step 2: Strip the Cable
Start by stripping the coaxial cable. Use the wire stripper to remove the outer jacket and expose the inner conductor and shield. Be careful not to damage the shield or conductor.
Step 3: Prepare the Connector
Next, prepare the SMA connector by unscrewing the outer barrel and sliding it over the cable. The barrel will have two parts: the outer shell and the inner sleeve.
Step 4: Attach the Inner Sleeve
Attach the inner sleeve to the center conductor of the cable. Use the pliers to crimp the sleeve onto the conductor, making sure it is firmly attached.
Step 5: Attach the Outer Shell
Slide the outer shell over the cable and onto the inner sleeve. Use the pliers to crimp the outer shell onto the cable, making sure it is firmly attached.
Step 6: Solder the Shield
Solder the shield to the outer shell of the SMA connector. Heat the connector with a soldering iron and apply a small amount of solder to the joint. Be careful not to overheat the connector or apply too much solder.
Step 7: Slide on the Barrel
Slide the outer barrel over the connector and onto the SMA connector body. Screw the barrel onto the connector body until it is snug.
Step 8: Insulate the Joint
If desired, you can insulate the joint between the connector and cable using heat shrink tubing. Slide the tubing over the joint and heat it with a heat gun until it shrinks and forms a tight seal.
Step 9: Test the Connection
Finally, test the connection to make sure it is working properly. Use a multimeter or other test equipment to check the continuity and signal quality of the connection.
Assembling an SMA connector is a relatively simple process, but it does require some basic tools and knowledge of electrical connections. By following these steps, you can create a secure and reliable connection that will perform well in a variety of applications. Whether you are building a custom RF system or repairing existing equipment, knowing how to assemble an SMA connector is a valuable skill to have.
If you have any remaining questions, our support staff is happy to assist you online or you can send us an email at service@elecbee.com.